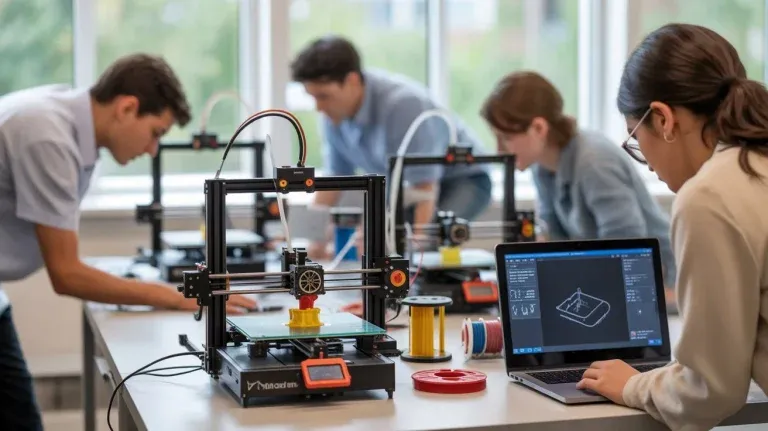
If you’re dialing in a new 3D printer setup, the slicer you choose can make or break your first few prints. A good slicer shouldn’t just “work”—it should help you get reliable adhesion, cleaner walls, and predictable print times without constant trial and error.
Orca Slicer has become a favorite among hobbyists and tinkerers because it balances power with a friendly workflow. This guide walks you through downloading, installing, and doing the first essential setup steps so you can start printing with confidence. Whether you’re coming from Cura, PrusaSlicer, or a manufacturer-provided slicer, you’ll find the transition straightforward especially if you follow a clean install and verify your printer and filament profiles early.
What makes Orca Slicer worth trying
Orca Slicer is designed for practical, repeatable results. It’s especially appealing if you like to fine-tune profiles but still want solid defaults.
- Quality-focused previews: Clear layer visualization helps you catch weak overhangs or sparse top layers before you waste filament.
- Profile-driven workflow: Printer, filament, and process settings are organized so you can swap materials without breaking everything else.
- Calibration-friendly: Great for enthusiasts who run temperature towers, flow tests, pressure/linear advance tuning, and more.
Before you install: quick compatibility checklist
A smooth install is mostly about preparation. Take two minutes to confirm the basics so you don’t troubleshoot problems that aren’t slicer-related.
- Operating system: Make sure you’re on a supported Windows, macOS, or Linux version.
- Hardware: 3D previews benefit from a decent GPU/driver setup, but most modern PCs are fine.
- Printer connection: Know whether you’ll print via SD/USB, direct USB, or over the network (OctoPrint, Klipper, etc.).
- Firmware expectations: Confirm whether your printer needs Marlin-style G-code, Klipper macros, or vendor-specific start/end routines.
Download Orca Slicer the right way
To avoid outdated builds or confusing mirrors, stick to the official download page. When you’re ready, you can download orca slicer for your operating system and save the installer to a known folder (like Downloads) so it’s easy to find.
Step-by-step installation (Windows, macOS, Linux)
The installation process is simple, but the small details matter—especially permissions and security prompts.
Windows
Run the installer, approve any security prompts, and keep the default install location unless your system drive is tight.
- Double-click the installer file.
- Choose “Install for all users” if you share the PC.
- Launch Orca Slicer and allow it through your firewall if you’ll use network printing.
MacOS
macOS may block new apps the first time. That’s normal.
- Open the downloaded app/package and drag the app into Applications if prompted.
- If blocked, go to System Settings > Privacy & Security and allow the app to open.
- Launch and confirm the app has access to files if you store profiles on external drives.
Linux
Install methods vary by distro. The key is ensuring execute permissions (if applicable) and desktop integration if you want it in your app launcher.
- Extract or install the package for your distro.
- Confirm you can launch the app from the GUI or terminal.
- Set up udev/permissions only if you plan to connect directly over USB.
First-launch setup: printer, filament, and essential checks
Your first five minutes inside Orca Slicer determine how “plug-and-play” it feels long-term. Focus on these items before you chase advanced tweaks.
- Select your printer profile: Bed size, nozzle diameter, and firmware flavor must match your machine.
- Choose a filament profile: Start with PLA or a known-easy material to validate motion and extrusion.
- Verify start/end G-code: Make sure homing, heating order, and purge lines match your printer’s habits.
- Run one calibration print: A simple cube or single-wall flow test can reveal over/under-extrusion immediately.
Common installation and setup issues (and fast fixes)
If something feels “off,” it’s usually a profile mismatch, a permissions issue, or a missed firmware detail—not a broken slicer.
- App won’t open: Check OS security prompts (macOS) or antivirus quarantine (Windows).
- Printer dimensions look wrong: Reconfirm bed size and origin settings in the printer profile.
- Stringing or blobs: Start with temperature and retraction tuning, then confirm filament diameter and flow ratio.
- First layer problems: Re-check Z-offset, bed mesh, and first-layer speed before changing advanced settings.
Conclusion
Orca Slicer can be a major upgrade for 3D printing enthusiasts who want both dependable defaults and the ability to fine-tune. If you download from the right place, install cleanly, and spend a few minutes validating printer and filament profiles, you’ll avoid most beginner headaches and get better prints sooner.
Take it one step at a time: install, select the correct profiles, confirm your start/end routines, and run a basic calibration print. Once those foundations are solid, you’ll be in a great position to explore more advanced features with confidence.
Disclaimer
The information provided in this guide is for educational and informational purposes only. While we aim to offer accurate and up-to-date instructions for downloading, installing, and using Orca Slicer, we cannot guarantee that all steps will work for every operating system, 3D printer model, or hardware configuration. Users are responsible for following manufacturer guidelines, handling their equipment safely, and verifying compatibility with their specific setup. The author and publisher are not liable for any damage to hardware, software, or materials, or any personal injury resulting from following this guide. Always back up important data and proceed with caution when installing and configuring software.